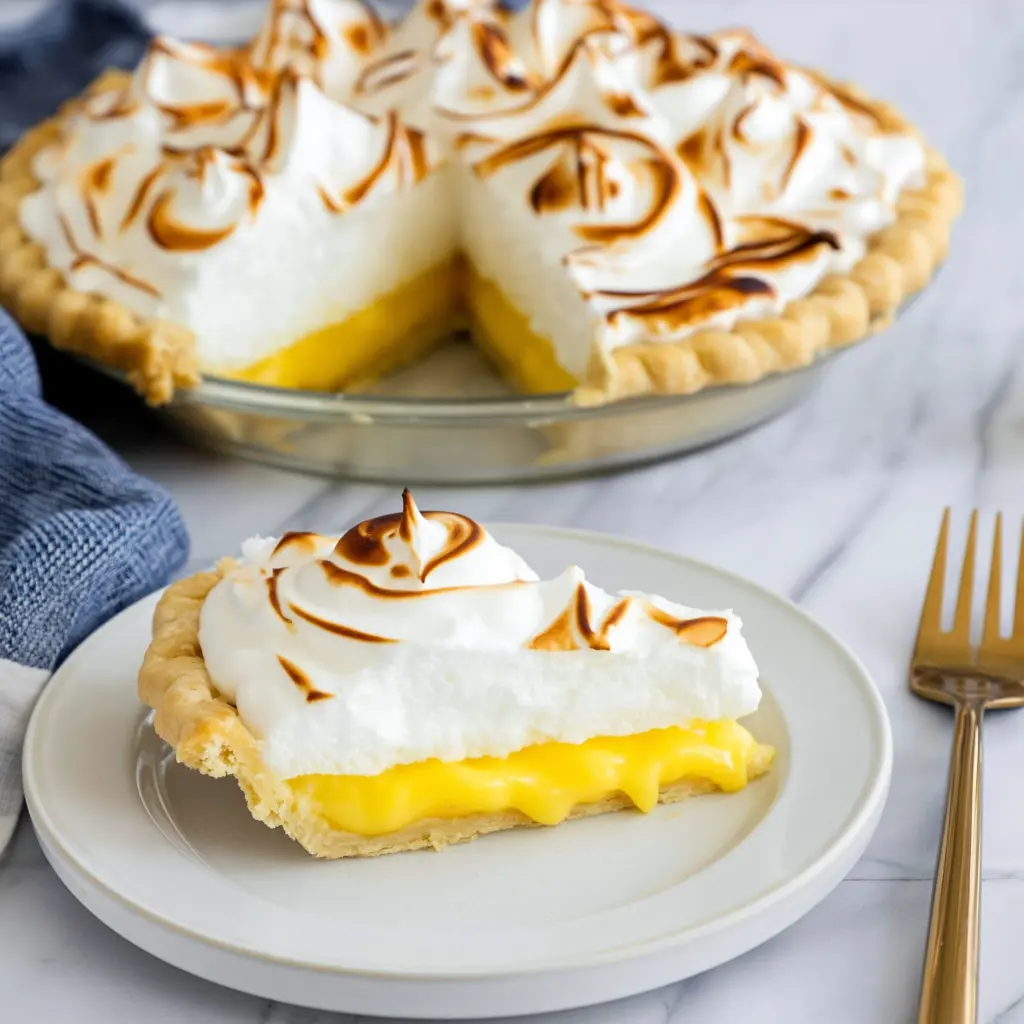
Lemon meringue pie has a very specific kind of appeal. It gives you a flaky crust, a sharp and silky filling, and a tall layer of meringue on top that feels light but still rich. When the balance is right, each slice has contrast in every bite. That is what makes this recipe stand out. It leans on familiar ingredients, but the method pays attention to the steps that matter most: a fully baked crust, a thick lemon filling, and a meringue that is heated before whipping so it holds its shape well.
This is not the kind of pie you rush, and that is part of why it works. The filling needs time to chill, and the pie is at its best when the structure has fully set before the meringue goes on. Even so, none of the individual steps are hard to follow. The recipe breaks the job into very manageable stages, which helps a lot with a dessert that can otherwise feel intimidating.
If you have had lemon meringue pie that wept, slid apart, or tasted overly sweet, this version aims for better balance. The lemon filling stays front and center, and the meringue is there to add softness and contrast, not to bury the citrus flavor.
A new and improved recipe
A strong lemon meringue pie starts with structure. That means the crust must be baked until dry and lightly browned before the filling goes in. A pale crust can soften too quickly once the lemon filling is added, which takes away from the clean slice you want later. Here, the crust is rolled out, fitted into the pie dish, docked, frozen, and blind baked. Those details help reduce shrinkage and give the shell a better chance of staying crisp.
The filling also gets careful treatment. Sugar and cornstarch are whisked together first, then water and egg yolks are added before the mixture is cooked. That order helps the filling thicken more evenly. Butter is stirred in after cooking, and the mixture is strained before the lemon zest and juice go in. Straining may seem like a small step, but it goes a long way toward a smoother final texture.
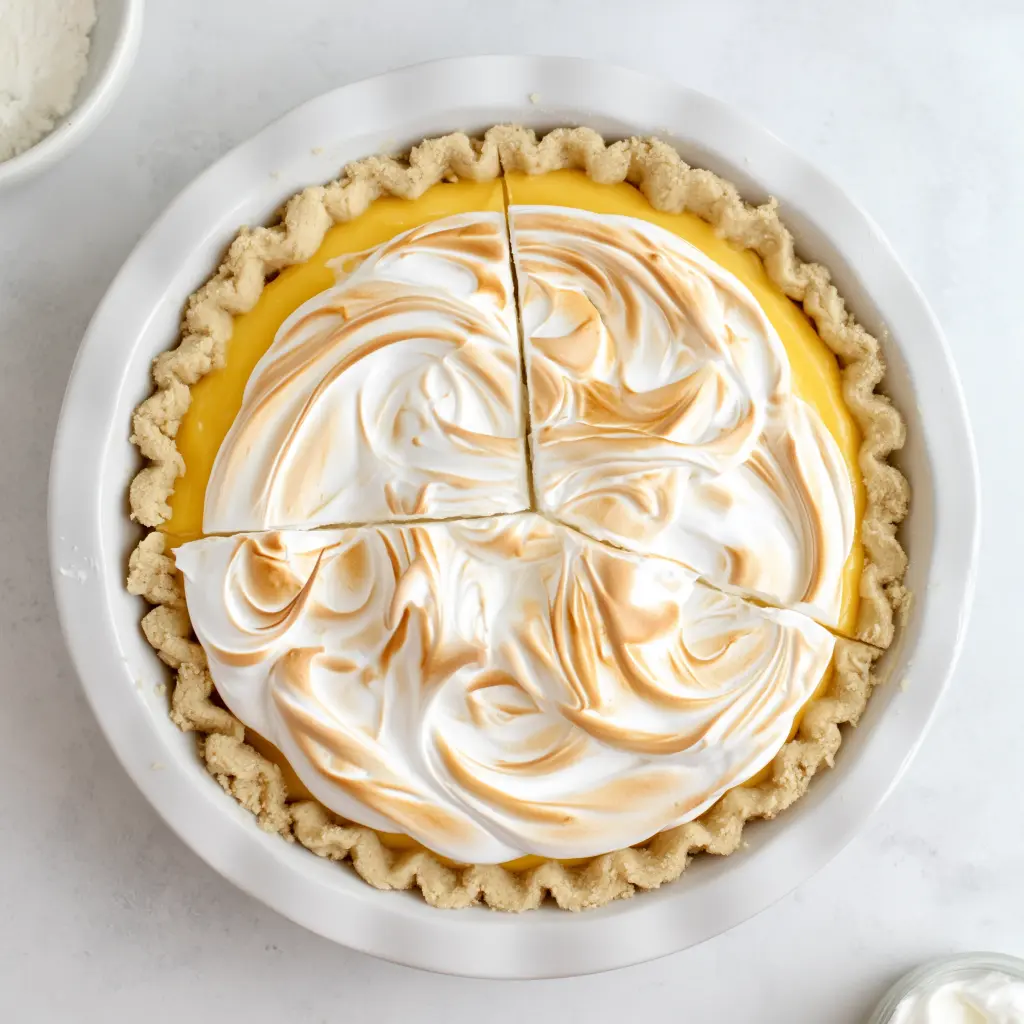
The meringue is another place where the method matters. Heating the sugar, egg whites, cream of tartar, and salt over simmering water until the mixture reaches 160°F gives you a more stable base. Once whipped to stiff peaks with vanilla, it can be spread over the chilled pie and toasted. The result is a topping that looks generous and stays much neater than a more casual meringue.
Ingredients you’ll need
The ingredient list is short enough to feel approachable, but each piece matters. The pie crust forms the base, so it should be rolled to about 13 inches to fit the dish comfortably and allow for trimming and crimping. The filling relies on granulated sugar for sweetness, cornstarch for thickening, water for body, egg yolks for richness, butter for smoothness, and both lemon zest and juice for flavor.
That mix of zest and juice is worth noting. The zest brings a fuller lemon aroma, while the juice gives the filling its clean tartness. Using both helps the pie taste bright rather than one-dimensional.
For the meringue, the ingredient list stays classic: granulated sugar, egg whites, cream of tartar, salt, and vanilla extract. Cream of tartar helps with stability, and the small amount of salt keeps the topping from tasting flat.
baking tip:How to separate eggs
This recipe uses both yolks and whites, so clean egg separation matters. It is easiest to separate eggs while they are still cold, since the yolks are firmer and less likely to break. Once separated, the whites can sit while you handle the rest of the prep.
It also helps to separate each egg into a small bowl before adding it to the larger batch. That way, if a yolk breaks into a white, you have only affected one egg rather than the whole set. Since the meringue depends on properly whipping the whites, keeping yolk out of that bowl gives you a much smoother path later.
Lemon meringue pie, step-by-step
Start by rolling out the crust, fitting it into the pie dish, trimming and crimping the edges, and docking the bottom with a fork. Freezing the crust for 30 minutes before baking helps it hold shape. Once the oven is preheated to 425°F, line the crust with greased foil and pie weights. Bake it for 20 minutes, then remove the weights and bake another 5 to 10 minutes until the shell looks dry and lightly browned.
For the filling, whisk the sugar and cornstarch in a saucepan, then stir in the water and whisk in the egg yolks. Bring the mixture to a boil over medium-high heat while stirring. Once it reaches that point, reduce the heat and cook for about 5 minutes until it thickens. Remove it from the heat, stir in the butter, strain the filling, then whisk in the lemon zest and lemon juice. That order helps preserve the fresh citrus flavor.
Pour the filling into the baked crust and chill it for at least 4 hours. This is the stage that asks for patience. A well-chilled filling is what allows the finished pie to cut into clean slices rather than spreading on the plate.
For the meringue, place the sugar, egg whites, cream of tartar, and salt over simmering water and whisk until the mixture reaches 160°F and the sugar has dissolved. Then beat it to stiff peaks, adding the vanilla while mixing. Spread the meringue over the chilled pie and toast it with a kitchen torch or under the broiler. Serve it right away or within 6 hours for the neatest finish.
Make-ahead instructions
The filling can be made ahead in the crust and chilled for at least 4 hours and up to 2 days, which is very helpful if you want to split the work across two days. That make-ahead option lets you handle the crust and filling first, then focus on the meringue closer to serving time.
The meringue is best added after the pie has fully chilled. Once torched or browned, the pie should be served right away or within 6 hours. That shorter window makes sense, since meringue is at its prettiest and most stable early on.
Recipe tips & FAQs
One of the most useful tips with lemon meringue pie is not to underbake the crust. A firm shell gives the filling a stable base and keeps the finished pie from feeling soggy too quickly.
Another helpful point is to watch texture during the filling stage. Once it thickens on the stove, you want to move forward with the butter, straining, and lemon additions without long delays. That keeps the process smooth and helps the filling stay glossy.
If you are wondering whether the pie can be fully finished far in advance, it is better to think in stages. The crust and filling can wait. The meringue is the part you want closer to serving time. That small bit of timing gives the whole dessert a cleaner look and a better final texture.
This recipe rewards care, but it does not ask for complicated techniques. That is what makes it appealing. It gives you a classic pie with bright flavor and a polished finish, while still feeling very possible in a home kitchen.

- Vanilla Bean Chiffon Cake That Feels Light and Special - April 27, 2026
- Favorite Vanilla Bean Cake That Tastes Rich and Tender - April 27, 2026
- Wonderful Mulberry Olive Oil Cake - April 27, 2026