Rhubarb Curd is a lovely way to turn a handful of simple ingredients into something that feels fresh, silky, and a little unexpected. Instead of leaning on lemon for tartness, this recipe lets the rhubarb do that work on its own. The result is a smooth curd with a soft pink look, a gentle sweetness, and the kind of tangy finish that wakes up everything it touches.
This is a recipe that feels at home in spring, but it is useful anytime you have rhubarb on hand and want more than a pie or crisp. It gives you a spread that works for breakfast, desserts, and little finishing touches on pastries. It also has a homemade look and flavor that feels thoughtful without being difficult.
The method is straightforward, but a few details matter. You cook the rhubarb first, separate the solids and liquid, and then build the curd from there. That extra step gives the final mixture a better texture and a cleaner rhubarb flavor. While the process is a little different from some fruit curds, it stays very manageable for a home kitchen.
Why This Rhubarb Curd Works
The biggest strength of this Rhubarb Curd is its balance. Rhubarb can be sharp and assertive on its own, but once it is simmered with sugar and water, then combined with eggs and butter, it settles into a smooth spread with both brightness and richness.
It is also a good recipe when you want something a bit different from citrus curd. Rhubarb gives you that tart note people often love in lemon curd, but with a softer, more delicate fruit character. The recipe description calls it silky smooth, and that is exactly what this method aims for.
Another nice part of this recipe is its flexibility. The finished curd can be spooned into pastries, spread onto breakfast breads, folded into other desserts, or served with ice cream. Because it is not overly sweet, it feels grown-up and balanced rather than candy-like.
Ingredients
This Rhubarb Curd uses a short list of ingredients, which makes each one easy to notice in the final result.
Rhubarb stalks are the heart of the recipe. Their natural tartness gives the curd its signature flavor, and once cooked down, they form the base of the puree-like solids that go back into the saucepan.
Sugar softens rhubarb’s sharp edge and helps build the curd’s classic sweet-tart balance.
Water helps the rhubarb break down in the first simmering stage.
Butter is stirred in at the end while the curd is still warm. It adds richness and gives the final texture a smoother finish.
Eggs thicken the curd and help turn the rhubarb mixture into something creamy rather than loose and saucy.
Pitaya powder or food coloring is optional. It is there for color rather than structure, so the curd can still be made without it.
How to Make Rhubarb Curd
Start by washing the rhubarb well and trimming away the white root ends and any parts where the stalk branches into leaves. After that, cut the stalks into strips and dice them. Keeping the pieces fairly small helps them soften more evenly.
Add the diced rhubarb, sugar, and water to a small saucepan. Bring the mixture to a boil, then lower the heat and let it simmer until the rhubarb breaks down. At this point, the mixture will look soft and jammy rather than crisp and chunky.
Press the cooked rhubarb through a sieve over a heat-safe bowl. This part separates the liquid from the solids. According to the method, the solids will have a puree-like texture. Let both portions cool, then return the rhubarb solids to the saucepan.
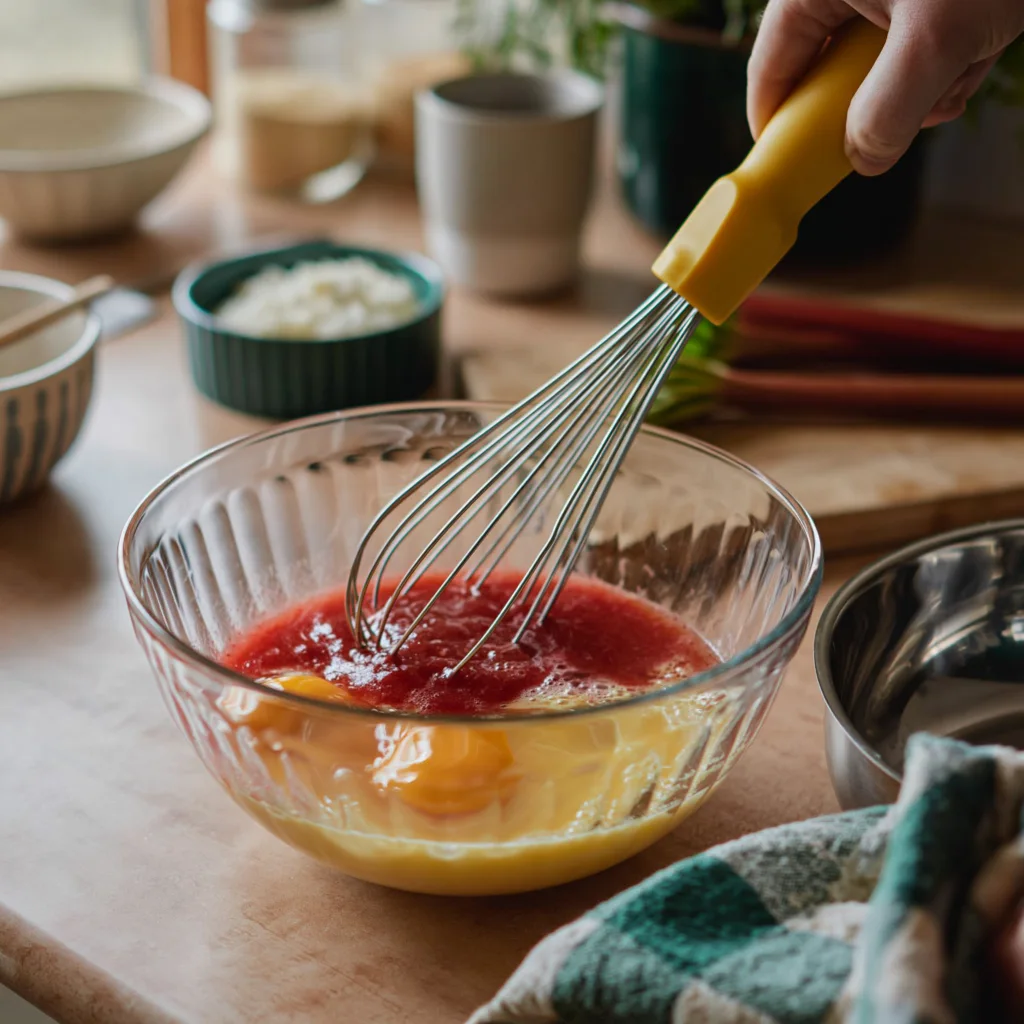
In a separate bowl, whisk the eggs until smooth. Pour in the reserved rhubarb liquid and whisk again until well combined. This step helps the eggs blend more evenly before they go back on the heat.
Place the saucepan over medium heat and slowly pour in the egg mixture while whisking constantly. Keep whisking for about 10 minutes. You are looking for a thicker texture that clings to the whisk rather than dripping off like a thin liquid. If you want extra pink color, add the pitaya powder or food coloring at this stage.
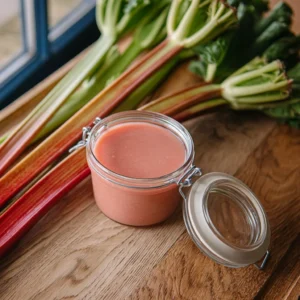
Pass the curd through the sieve one more time to catch any cooked egg bits. While it is still warm, stir in the butter until fully melted. Then spoon the curd into a jar and let it cool before storing it in the refrigerator.
Tips for the Best Texture
The sieving steps are a big part of what gives this Rhubarb Curd a smooth finish. The first pass separates the liquid and solids so you can build the texture in layers. The second pass cleans up any tiny egg bits that may form during cooking.
Letting the rhubarb solids and liquid cool a little before mixing the eggs with the liquid is also helpful. It lowers the chance of the eggs cooking too fast the moment they are added.
When you return everything to the stove, whisk steadily and do not rush the heat. Medium heat is enough. The goal is a gradual thickening, not a quick boil. Once the curd thickens and starts clinging to the whisk, it is close.
Stir the butter in while the curd is still warm. That way it melts fully and leaves you with a glossy, rich finish rather than greasy streaks.
How to Serve Rhubarb Curd
This Rhubarb Curd works beautifully as a spread. Spoon it onto toast, English muffins, biscuits, or scones for breakfast. Its tartness cuts through buttery breads very nicely.
It also fits naturally into dessert. Use it to fill tart shells, sandwich cookies, thumbprint cookies, or layered cakes. Because the flavor is bright but not harsh, it works well with whipped cream, soft cakes, and vanilla-forward desserts.
The recipe description also mentions pastries and ice cream, and both are very good matches. A spoonful over vanilla ice cream gives you a simple dessert with very little extra work, while a layer inside pastries makes them feel much more finished.
Storage and Make-Ahead Tips
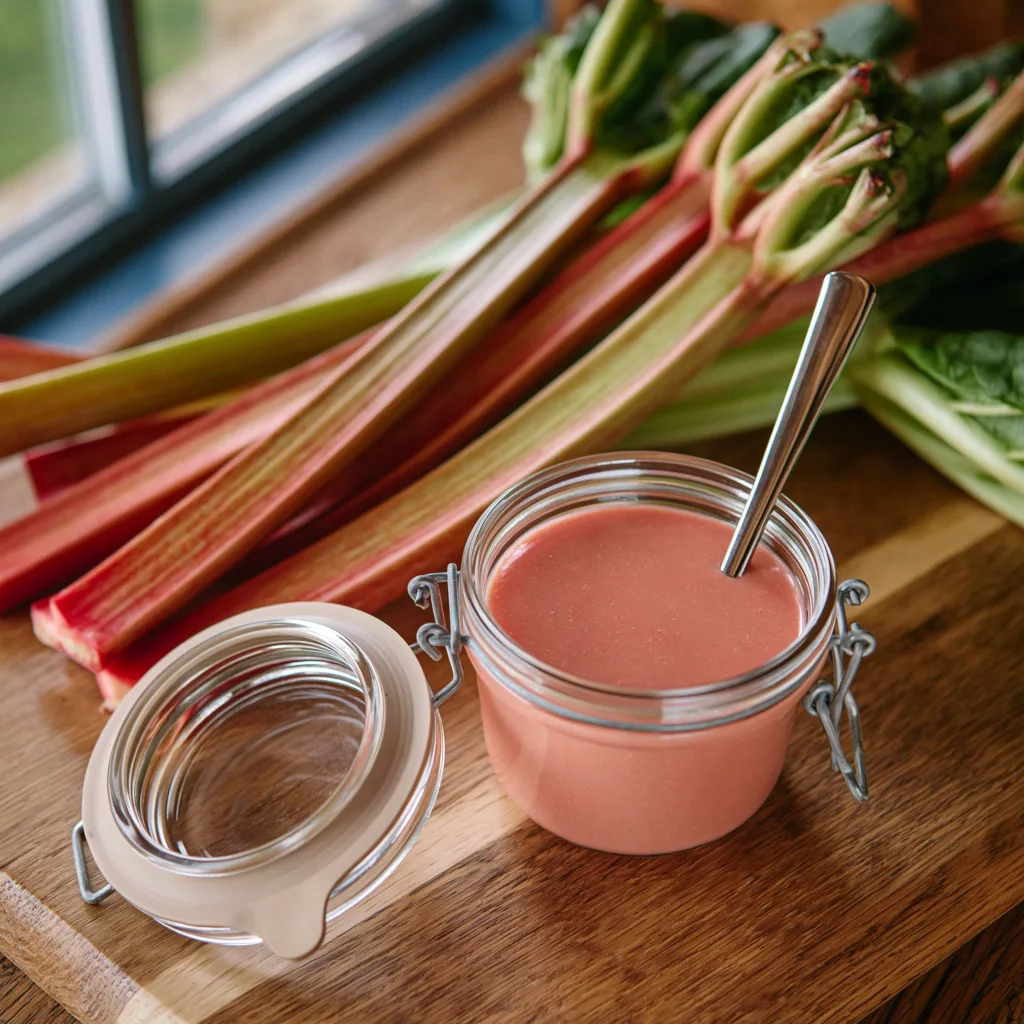
Once cooled, this Rhubarb Curd can be stored in an airtight container in the refrigerator for up to one week. That makes it a useful make-ahead component for brunches, spring desserts, or little weekday treats.
Freezing directions were not provided here, so the clearest plan is to refrigerate the curd and use it within that one-week window. Since this recipe already stores well in the fridge, it is easy to make it a day or two before you want to serve it.
Rhubarb Curd FAQs
Does rhubarb have enough acidity for curd?
Yes. The recipe description notes that this curd is made using the rhubarb stalks’ own acidity.
Do I have to use pitaya powder?
No. It is optional and used for color.
Why are the solids added back to the saucepan?
They carry the rhubarb body and flavor that help make the curd feel full and fruit-forward.
How do I know when the curd is thick enough?
The method says it will start to thicken and stick to the whisk instead of dripping off like a liquid.
Rhubarb Curd
Ingredients
- 2 Cups Rhubarb Stalks Diced
- 1/4 Cup Sugar
- 1/4 Cup Water
- 1/4 Cup Butter
- 3 Eggs
- 1 Tbsp Pitaya Powder Or food coloring, optional
Instructions
- To prep the rhubarb stalks wash them well and then top and tail each stalk by removing any white root and where the stalk branches into leaves. Then slice vertically into 1/2 inch strips and finally dice horizontally.
- In a small saucepan on medium-high heat combine rhubarb, sugar, and water. Bring to a boil and then reduce to medium low to simmer. Cook for about ten minutes until the rhubarb is soft and broken down.
- Using a spatula to help, pass the rhubarb mixture through a sieve over a heat-safe bowl. The spatula will help by manually breaking down the rhubarb further. The liquids will separate. Let both the rhubarb solids and the liquids cool. Add the rhubarb solids back into the saucepan.
- Add three eggs to a separate bowl and whisk until uniform. Pour the rhubarb liquids into the egg and whisk until well combined.
- Pop the saucepan back on the stove on medium heat, and slowly pour in the egg mixture, whisking constantly for about ten minutes. The curd will start to thicken and stick to the whisk instead of dripping off like a liquid would.
- If you are adding pitaya powder or food coloring, add it now.
- Pass the mixture back through the sieve to catch any accidentally cooked egg bits. While still warm, stir in the butter until completely melted.
- Pour into a jar and let cool. This can be stored in an airtight container in the fridge for up to one week.
Notes

- Vanilla Bean Chiffon Cake That Feels Light and Special - April 27, 2026
- Favorite Vanilla Bean Cake That Tastes Rich and Tender - April 27, 2026
- Wonderful Mulberry Olive Oil Cake - April 27, 2026